YouTube is a great place to host your videos, and to attract the attention of new potential customers or blog subscribers. Whether you’re a small business or a blogger, it can play an important part in your marketing strategy.
But how do you get started with YouTube? In this guide we’ll look at how to create a YouTube channel for your business or blog, as well as some tips to help you optimize your channel, and advice on creating videos.
How to make a YouTube channel
Setting up a YouTube channel is really easy. First, you’ll need a Google account. You’ll already have one if you use Gmail, or you’ve logged in to another Google service (including YouTube).
If you don’t have a Google Account, you can create one here.
Once you’ve done that, head over to YouTube and log in.
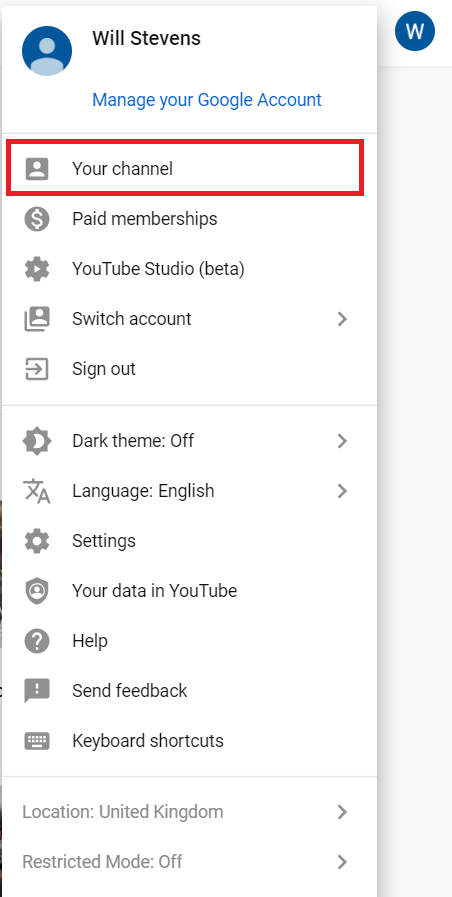
On your personalized YouTube homepage you’ll see that in the top right-hand corner there’s a circle which is either your profile picture, or, if you haven’t set a profile picture, your first initial.
Click the circle and a dropdown menu will appear, then click “Your Channel”.
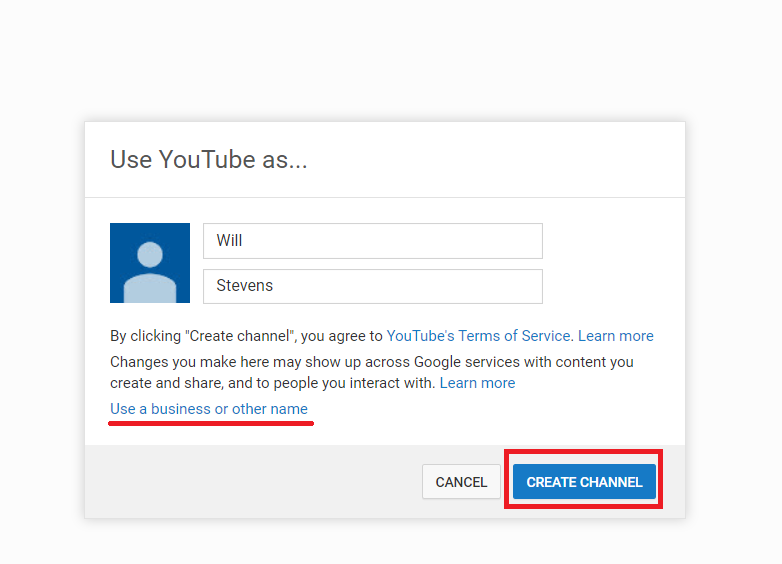
Once you’ve done that, you’ll be presented with a page that allows you to create a personal YouTube channel using your own name.
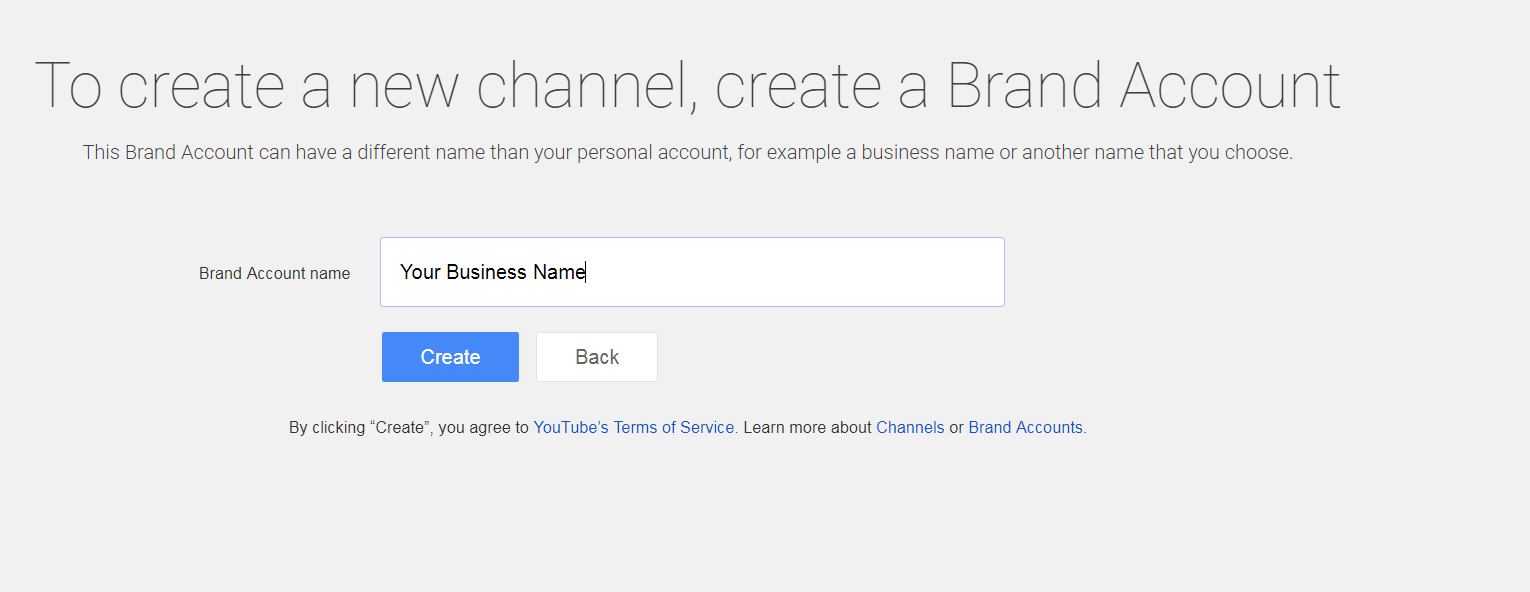
But if you want to create a business or brand channel, click the link that says “Use a business or other name”.
You’ll need to choose a channel name. If you’re creating a YouTube channel for a blog, you might want to use your own name, or the name of your blog.
If you’re creating a YouTube channel for a business, it makes sense to go with the business name option, which looks like this:
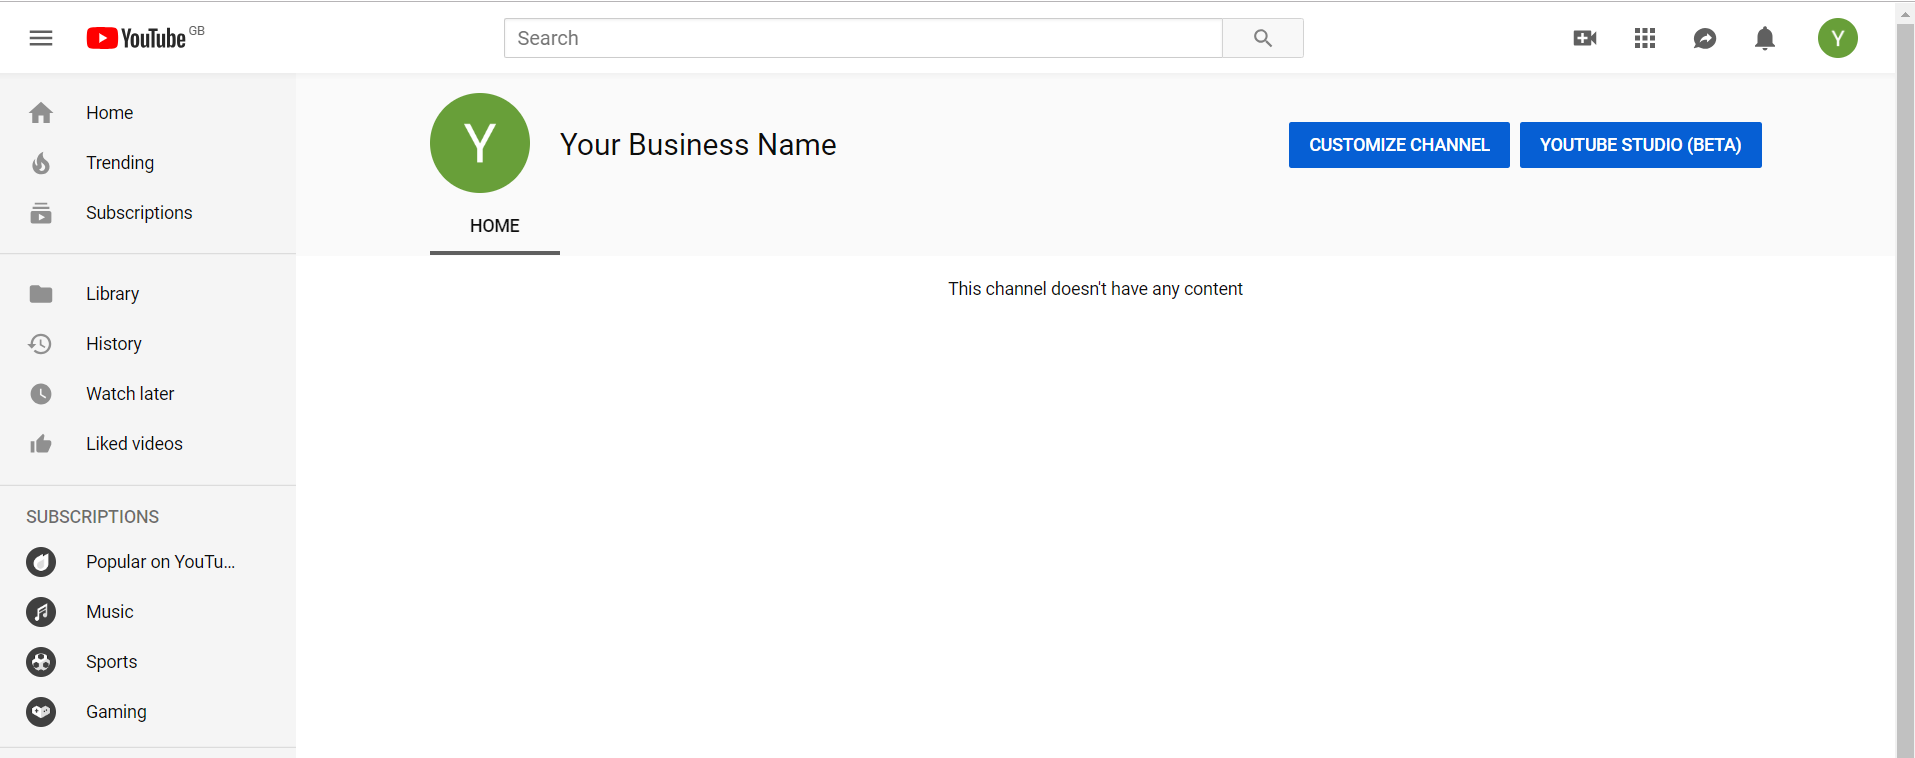
Whichever option you decide to go for, once you hit either the “create channel” or “create account” button you’ll be taken to your new YouTube channel, which will look something like this:
Note: It is possible to set up both a brand channel and a personal channel, but we suggest you pick one option and stick to it. That way, you’ll be focusing your audience-building efforts on one channel. If you need to create a channel for more than one business, then it’s probably best to create them on separate accounts.
Optimizing your YouTube channel
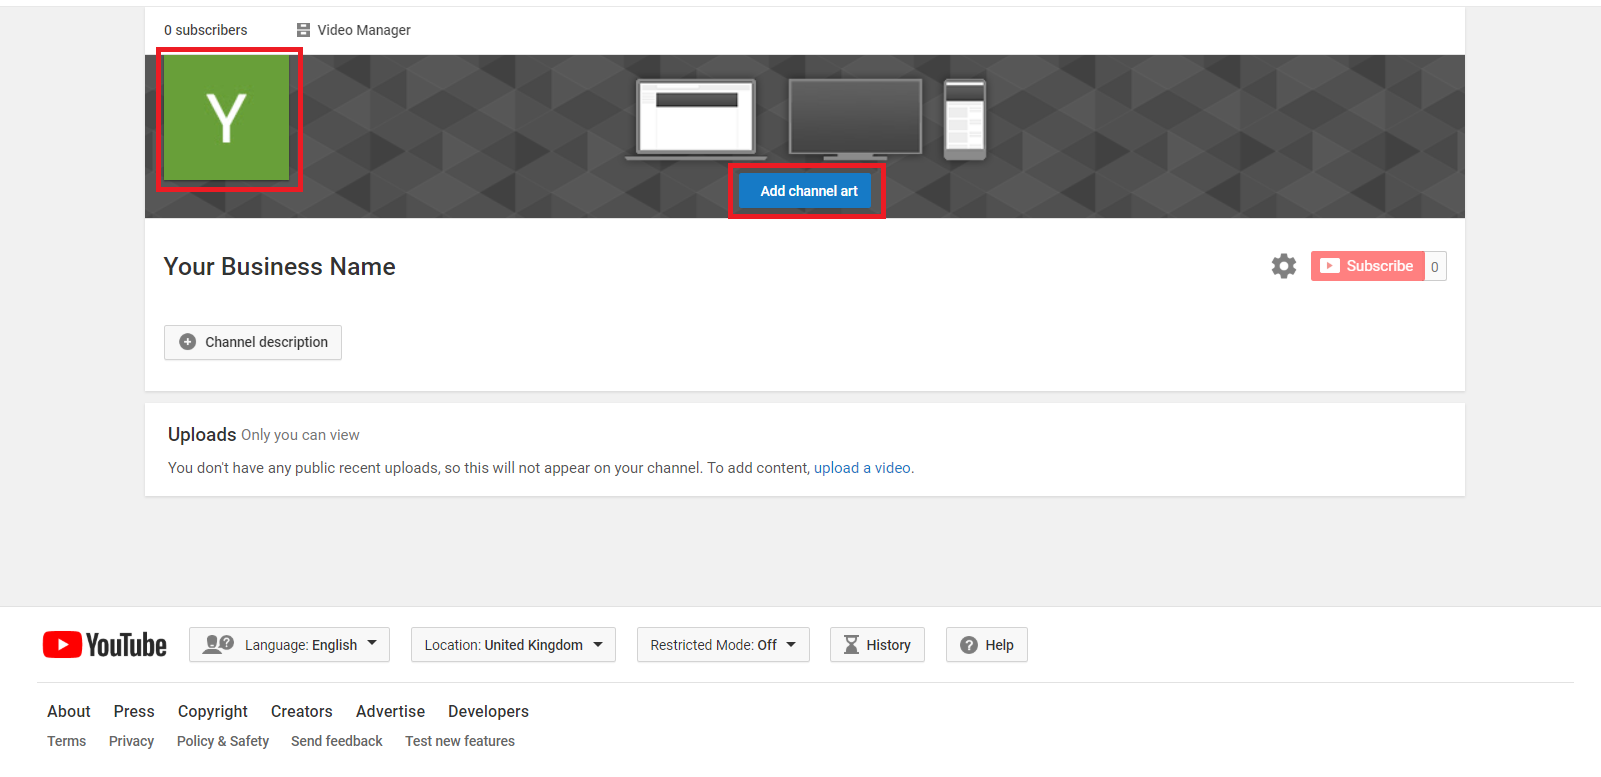
Okay, so your YouTube channel is now up and running but as you’ve probably noticed, it looks pretty empty.
Let’s start by optimizing your YouTube channel. (Note: If you leave your channel at any point and want to return to it later, you can do so by clicking “Your channel” if you created a personal channel. If you created a brand channel, you may need to click “Switch account” and then the name of your brand account before clicking “Your channel”.)
The first thing you’ll want to do is add an image to your channel. For a brand channel this will probably be your logo, while for a personal channel it will likely be a headshot of yourself.
The profile picture, or channel icon should be 800px x 800px. If you don’t have a logo, then you can get one quickly by using a tool like GoDaddy Studio, which comes as part of the GoDaddy Website Builder package. Not a Website Builder customer? Then try the free GoDaddy Logo Maker. (You can also use it to create thumbnails for your videos when you begin uploading content.)
Once you’ve got a logo (or headshot) you like, hit the “customize channel” button on your channel’s homepage, then move your cursor over the square area (which will either have your/your business’s first initial in it, or your existing profile picture) and click the pencil icon in its top right corner. You can then upload your new logo/headshot. This will appear as your channel icon.
You should also add “channel art”. This is essentially a channel banner and it’s a great place to tell visitors to your channel more about what you do. You can also link to your social media profiles here.
The recommended size for channel art is 2560px x 1440 pixels, and again you can create this using a tool like GoDaddy Studio. You can also use a photo you’ve taken, or any image you have the rights to use (such as a stock photo you’ve paid for). Remember though, YouTube is all about engaging visuals, so it’s probably best to create something yourself.
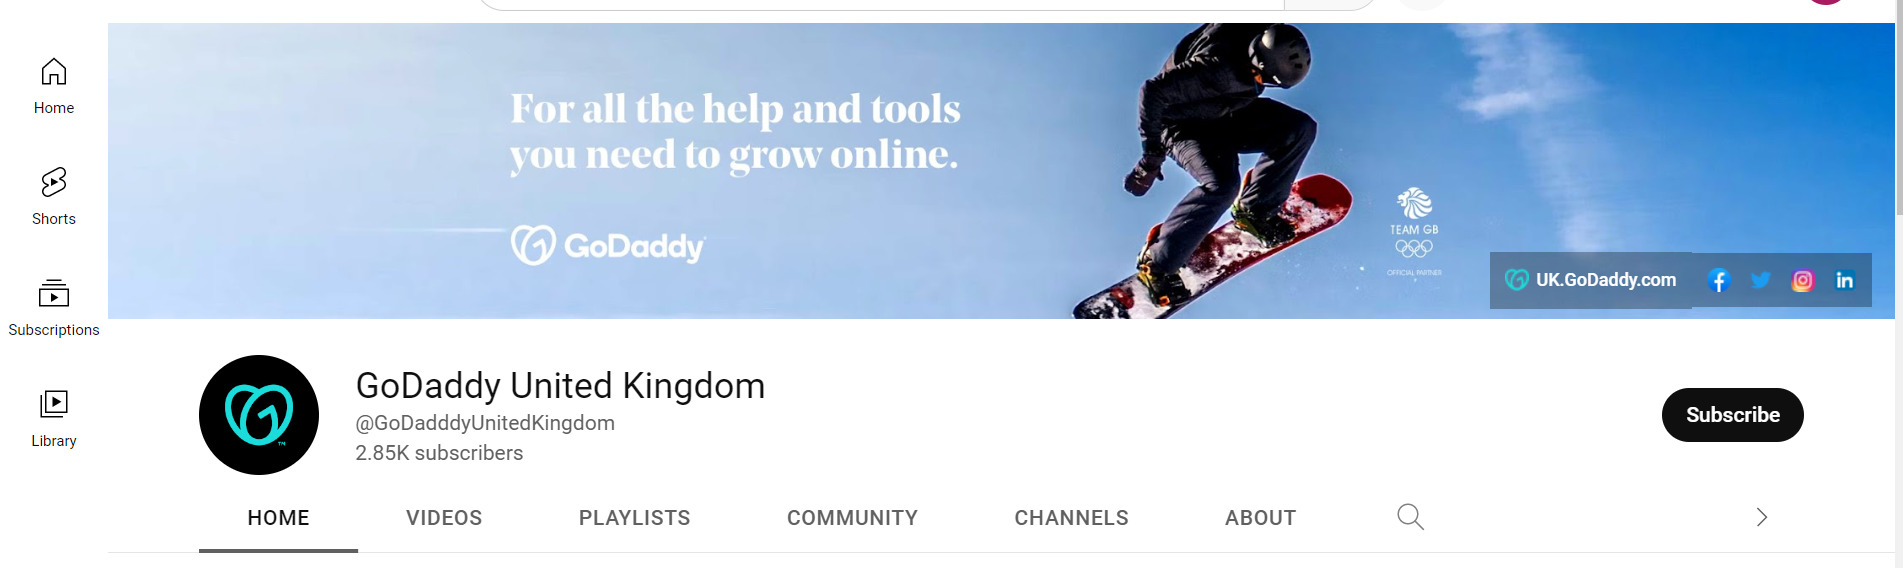
Here’s the GoDaddy UK channel art – it features social media and website links in the bottom right.
It’s also important to add a channel description at this stage. This should tell people what your channel is about. So if you’re running a brand channel, you’ll likely explain what your business does and the products/services you offer. If you’re running a personal channel, then you’ll probably want to use this space to tell people about yourself, what topics you blog on and what to expect from your videos.
You can find the “add channel description” button by clicking on the “about” tab in on the customize channel page. You can also add an email address for business queries, your location and links.
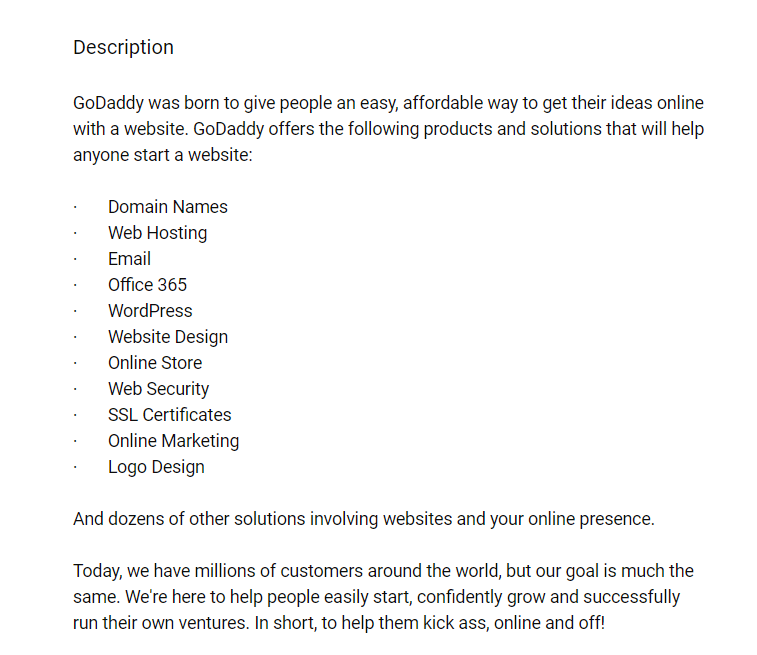
Here’s the GoDaddy UK channel description, location and links.
As you create and upload video content, you may want to update the look of your channel so it matches your current videos.
Start planning your YouTube content
That’s the basics of optimizing your profile covered, so it’s time to start thinking about what sort of videos you’ll be creating for your channel.
It might be tempting to jump straight in and start filming, but as with all internet content planning always pays dividends.
If you’re running a brand channel, you’ll need to come up with ideas that are interesting to your potential customers, as well as relevant to your brand. For personal channels, you’ll likely have a specific kind of audience in mind, but you don’t have to worry about making your content relevant to a product or service.
You’ll also need to consider how people are going to find your videos. The most likely options are via search (not just YouTube’s search engine, but also Google) and via social media.
Focusing on search as a channel to attract viewers is a good idea as it means your videos will be watched long after they’re first uploaded. Check out this guide to YouTube keyword research to learn how to plan your content around search.
You’ll also need to plan how you’re going to create your videos.
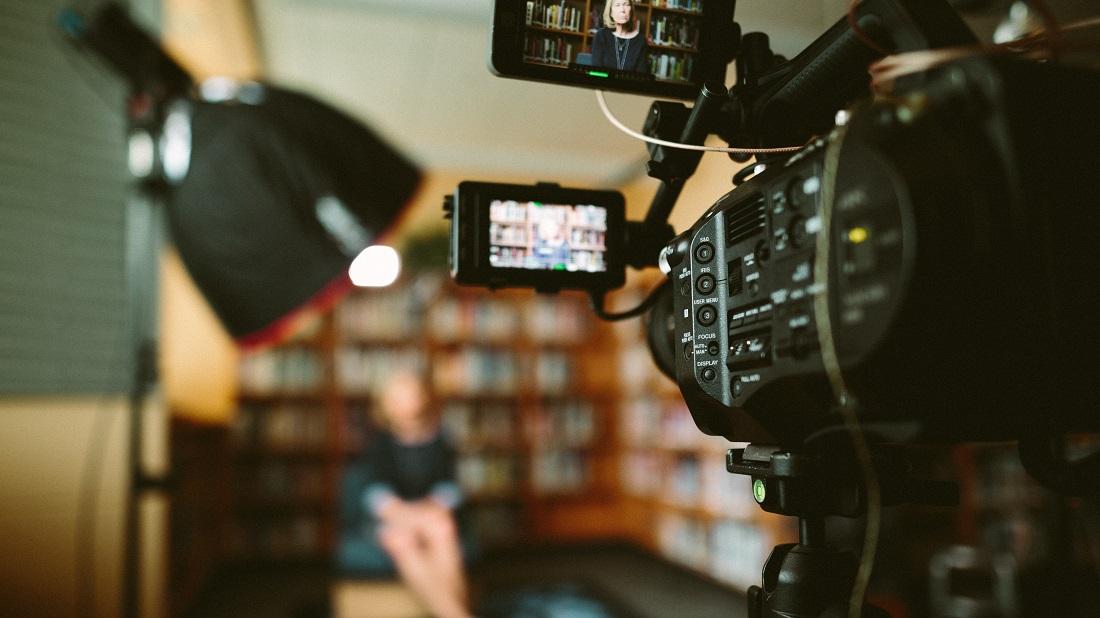
The good news is, you don’t need to spend a fortune on a fancy camera – if you have a smartphone with an HD camera then you can create high-quality videos.
Some areas where you should consider investing money are:
Tripod – A tripod to keep your camera steady is a great investment
Sound – a good microphone will make a huge difference to the quality of your videos
Lighting – even a cheap light will make your videos look more professional
Editing software – Video editing isn’t easy, but a decent software package will make it easier.
Start making videos
You’re now at the stage where you can start making videos for your YouTube account.
A good place to begin is by creating a channel trailer, which is a short introductory video to let people know what your channel is about.
You can read more about how to make a channel trailer here.
Don’t feel you have to upload a video once you’ve made it. There’s no harm in practising, or in asking people for feedback on your early attempts.
But also don’t think your the first video you upload has to be perfect. You’ll only improve as you create new videos.
Remember though, the type of content you create for your videos should always be focused on your business’s (or blog’s) target audience. If you don’t do this, you could end up creating popular videos that attract people who aren’t actually interested in what you offer away from YouTube.
If you’re targeting a specific niche, it’s perfectly possible to have a successful business channel on YouTube that only attracts a few hundred visitors per video. When it comes to YouTube views for businesses, it’s about quality and relevance, not quantity!
Upload and optimize your videos
The upload button for your channel is a video camera with a plus sign in it and it can be found in the top right of the screen.
Uploading is a simple process, although it may take a while depending on the size of the file being uploaded.
We’ve already talked about the importance of optimizing your YouTube videos for search, and when uploading your video you’ll be able to give it a title and description, which should include the relevant keywords you researched when planning your content.
You can learn more about YouTube SEO in this guide. Getting your SEO right will help your chances of showing up in YouTube search as well as general search engines such as Google.
It’s also important to publish videos on a regular basis. You may want to record several videos at once and then schedule them on a weekly basis.
Promoting your videos
Once a video is live, you need to promote it. This can be done by sharing it on social media platforms, including it on your website (or in a blog post), and by using influencer marketing.
You can find a guide to promoting YouTube videos here.
You can also repurpose your videos for other social networks, including TikTok. If you link back to your YouTube profile, you can use wider social media marketing to grow your following across multiple platforms at the same time.
Also, if people comment on your videos, reply to them! It’s a good way to start building a community and a successful YouTube channel. YouTube marketing is an ongoing process, so build a plan to promote your videos and keep doing it!
Analyse and improve
There’s a wealth of information available via YouTube Analytics, and you can use this to improve the videos you create.
Check out this guide to getting to grips with YouTube Analytics.
Summing up
So there you have it, a guide to making a YouTube channel, and planning and creating your videos. Remember: success won’t be instant, so keep going even if it seems like no one’s watching.